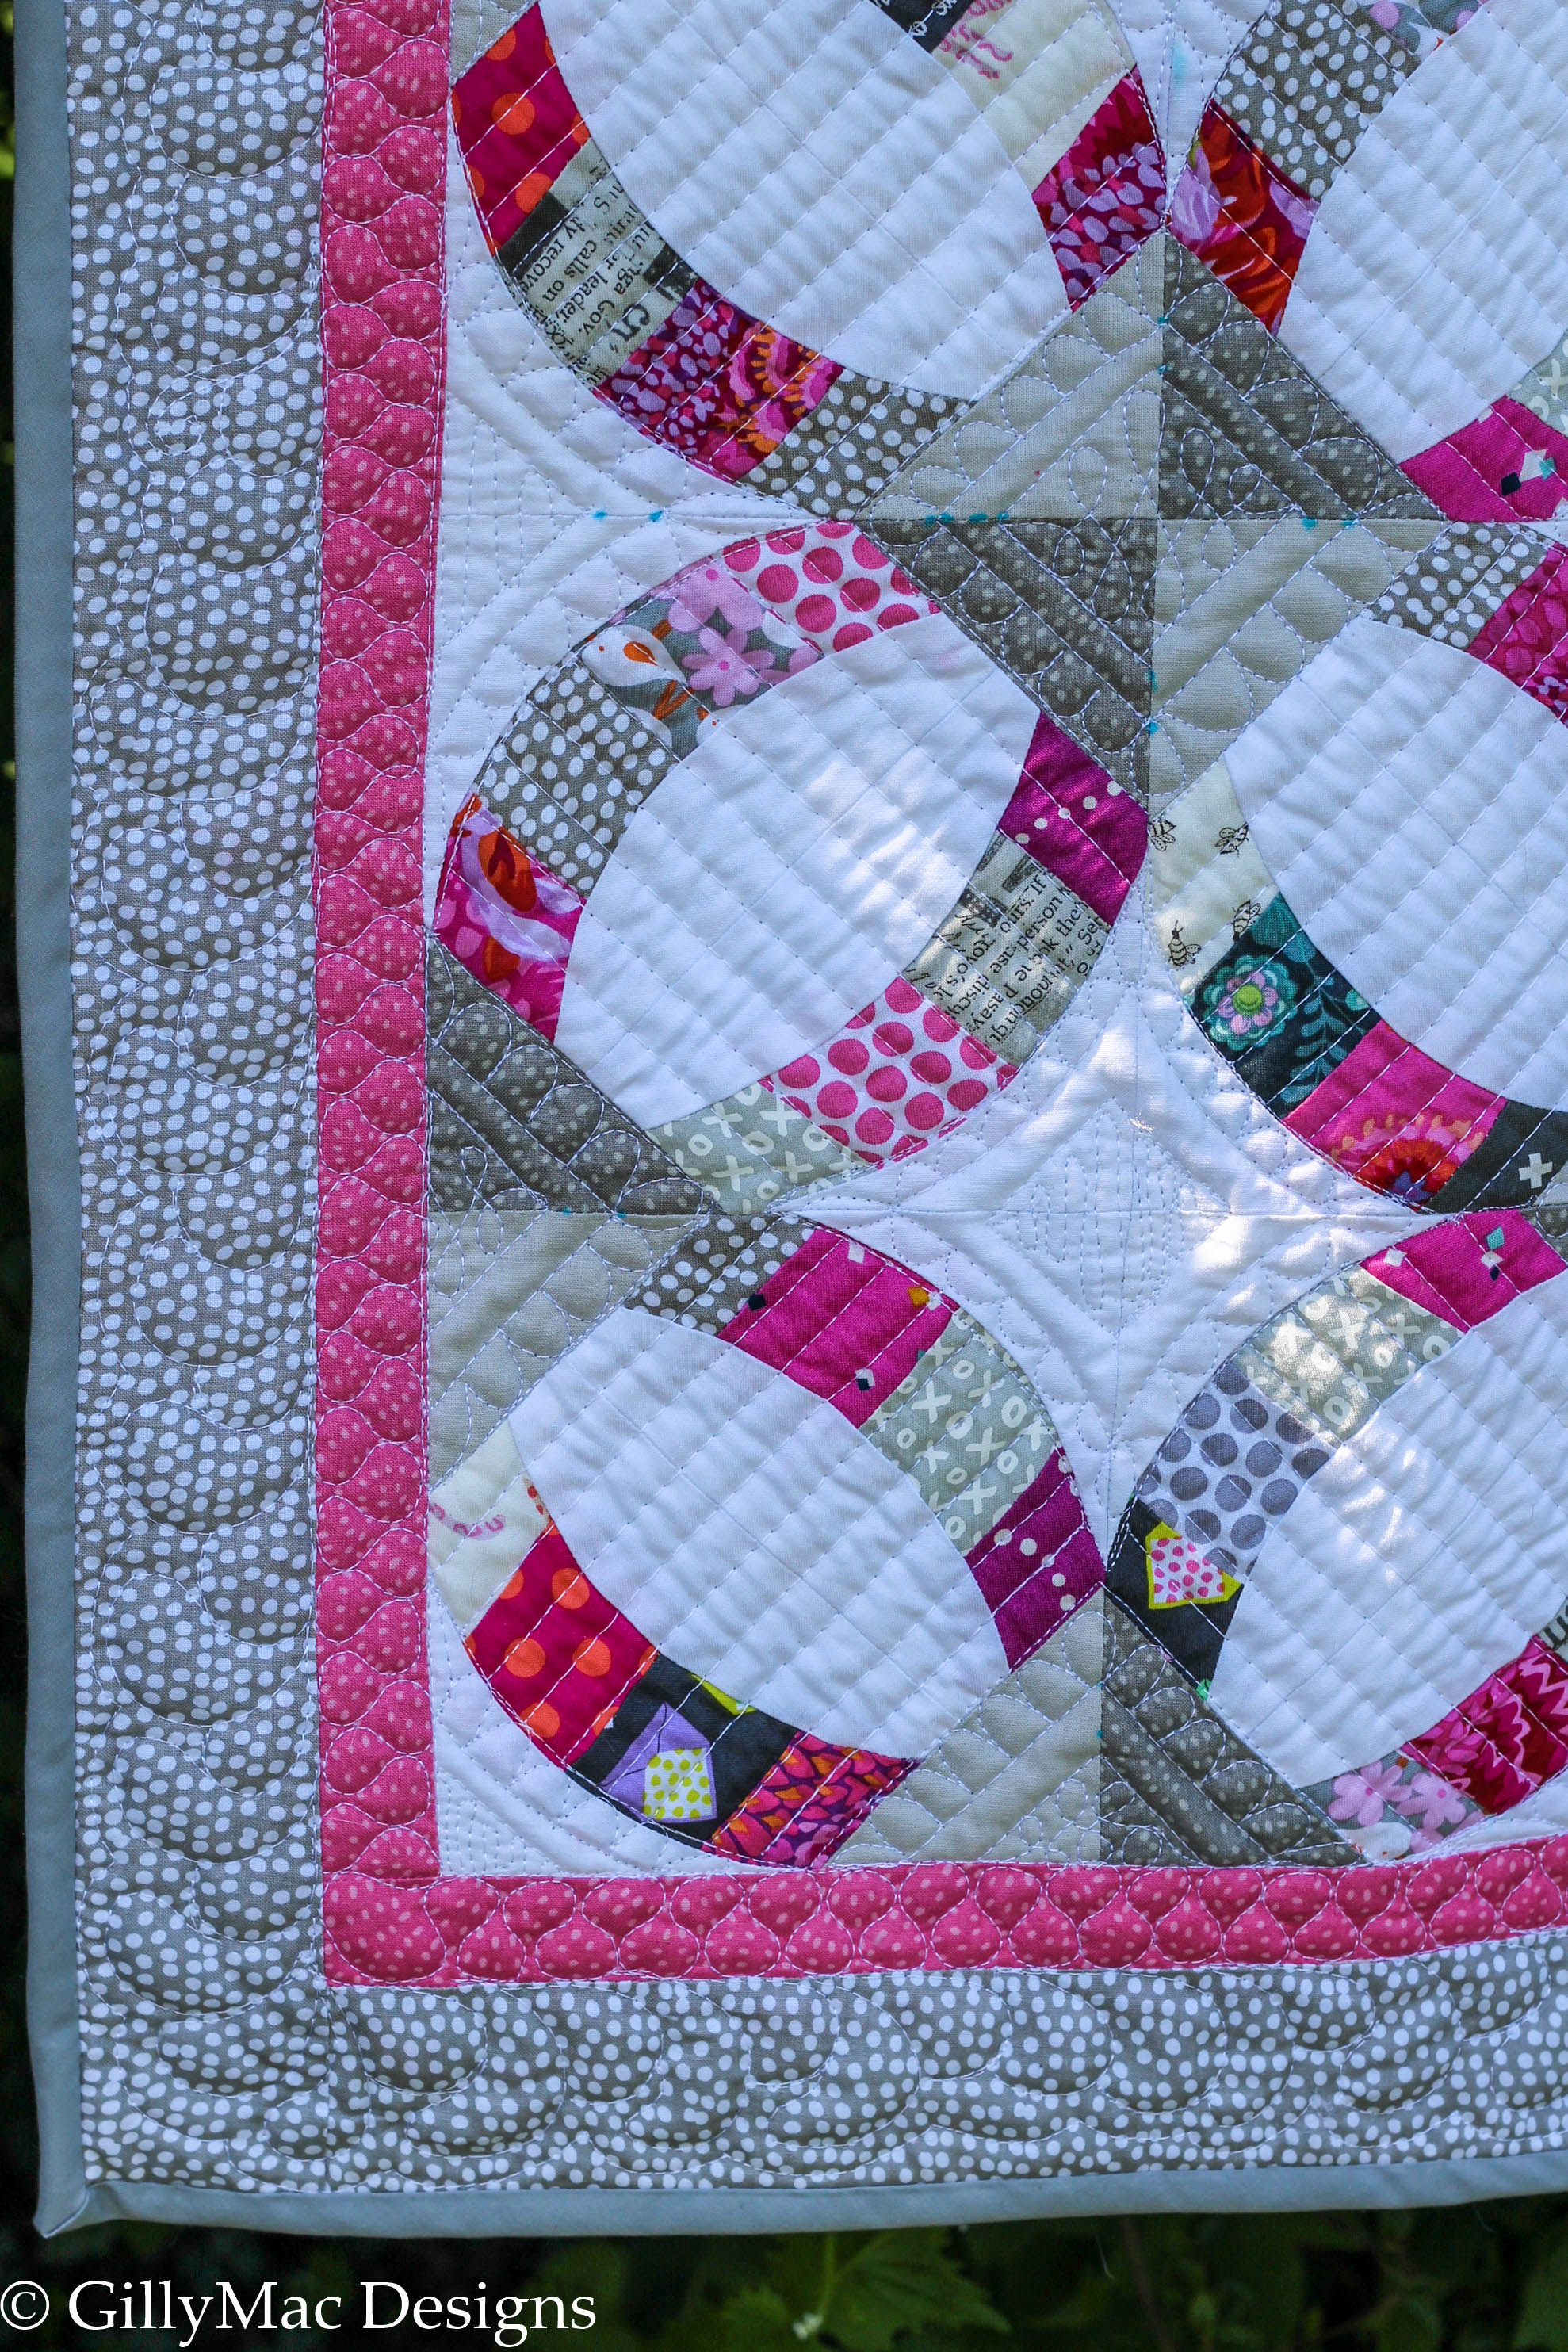
Deborah and I made this stunning quilt together. She did the hard work in the patchwork piecing and I got to quilt it, and whilst I wanted the background to be a brilliant white, she chose the wonderful colours that make up the rings.

It was made using the Mini Quick Curve Ruler by Sew Kind of Wonderful. At the end of last year, I invested in a number of both the mini and full-size rulers for my classes. I really like working with rulers and teaching using good rulers. The best rulers are the really versatile ones. By that, I mean ruler with good markings on them so you can move them increments of partial inches and lines on so you can cut with the ‘on point’. These rulers have all those features AND they have matching quilting rulers which are excellent for identically matching the curves, inside and outside of your piecing work.
This quilt can be made using the larger ruler, but we chose to use the smaller one as I wanted to check out the suitability of this pattern for a cot size quilt – and it doesn’t disappoint. It is built using 2″ x 10″ strips, (for the larger quilt jelly roll strips are suggested). Although the pattern suggests using 20 10″ squares, in fact, we would recommend not bothering with this and just cutting up scraps, which are 10″ long, into 2″ slices. We found that the more colour tones we used and patterns we incorporated the more interesting the final quilt became. Fabric with smaller prints work best with this quilt as larger prints would get chopped up and lost. The strips are sewn together in batches and then cut cross-ways using the ruler.

As with all our rulers, we added Handi Quilter gripper to the back of them to stop them slipping as we cut out the fabric. This is essential and the Handi-Grip product is the best one that I’ve found (and a little goes a long way). The rulers have a slot in them that you place the rotary cutter in and move it along. We did think the slot was quite wide, but if you are consistent with how you place your cutter then this isn’t a problem.
More of an issue with the mini version Deborah was making, was that the pieces were small and partly bias cut, so were quite unstable. This meant that if you didn’t iron them they would curl slightly and not sew together well, but if you ironed them, even a little too vigorously, they would stretch and be useless. When you test out a quilt pattern, you are most often halfway through the patchworking build before the penny drops and we see how to get it working well. This quilt was no different and after a number of goes building the curved block only to find that they were too small, we tweaked the pattern to make it ‘full proof’.
The choice of the colours used in the blocks joining the rings is really important. If you decide to make this quilt yourself, consider carefully what colour and pattern to use for these pieces. Deborah chose a Dashwood Twist in smoke and a Kona grey.
Below I have attached a free quick reference guide for quilting this piece. The correct quilting rulers make the job much easier and I enjoyed filling in the shapes I made with very basic designs. This was not a hard quilt to make look good.

 I am thrilled with this quilt. It would make a stunning baby gift or maybe one day I will get around to making the larger one for my bed! Sew Kind of Wonderful has lots of patterns using the quick curve rulers. The rulers themselves can be bought from Creative Grids, though I did have to buy the matching quilting rulers from Sew Kind of Wonderful in the USA.
GillyMac Metro Rings Quilting Plan
There are two classes this year to make this quilt… 20th June and 6th November, both classes are at my studio in Maidenhead and run from 10am -3.30pm – with lots of tea and homemade cakes – of course! Every student gets an original copy of the pattern to go home with.
