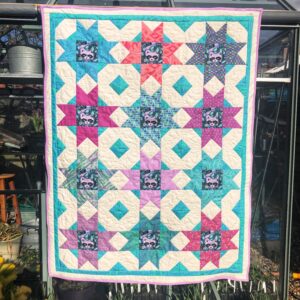
Let’s make the quilt. All seams we are about the sew are ¼”. If you didn’t collect the requirements in last week’s post, you could find them here.
- Make twelve blocks using the method in the video here.

-
Join the blocks to create four rows of three blocks each. When sewing the blocks together in each row, carefully match the points where the seams meet. After all four rows are assembled, press the seams with a hot iron. To help the seams nest neatly when you join the rows, press the seams between blocks to the left on rows 1 and 3, and to the right on rows 2 and 4. As you sew the rows together, again take care to align those same matching points.


3. Using the five 1½” strips of corner-tip fabric:
-
Cut one strip in half to create two shorter strips.
-
Join each shorter strip to the end of a full-length strip, making two extra-long strips.
You’ll now have two regular-length strips and two extra-long strips.
4. Next:
-
Sew the extra-long strips to the sides of the quilt-block panel. Press the seams outward and trim any excess.
-
Sew the regular-length strips to the top and bottom, then press and trim.
5. For the final border, repeat this same method (Steps 1–4) with the background fabric strips.
In my next post, I’ll share three quilting ideas for finishing your quilt.
I’d love to see your version—feel free to email photos to mail@gillymacdesigns.com.
—Gill