Many people find quilting the most challenging part of the quilt-making process. In this post, I will give you some ideas on how to quilt this Baby Quilt, but I want to encourage you to have a go and finish off this gorgeous project.
How to set up for quilting success
I’m sure I’m not the only one who dreams of quilting every project like an award-winning professional. But I’m not a professional quilter, and I don’t own a long-arm machine—so I quilt within the limits of my skills and equipment. That’s exactly what I encourage you to do: work at a level that feels comfortable until you are ready to take the next step.
It’s wonderful to challenge ourselves, but real growth happens when we first feel confident with where we are today.
Quilting Pattern No. 1 – Walking Foot

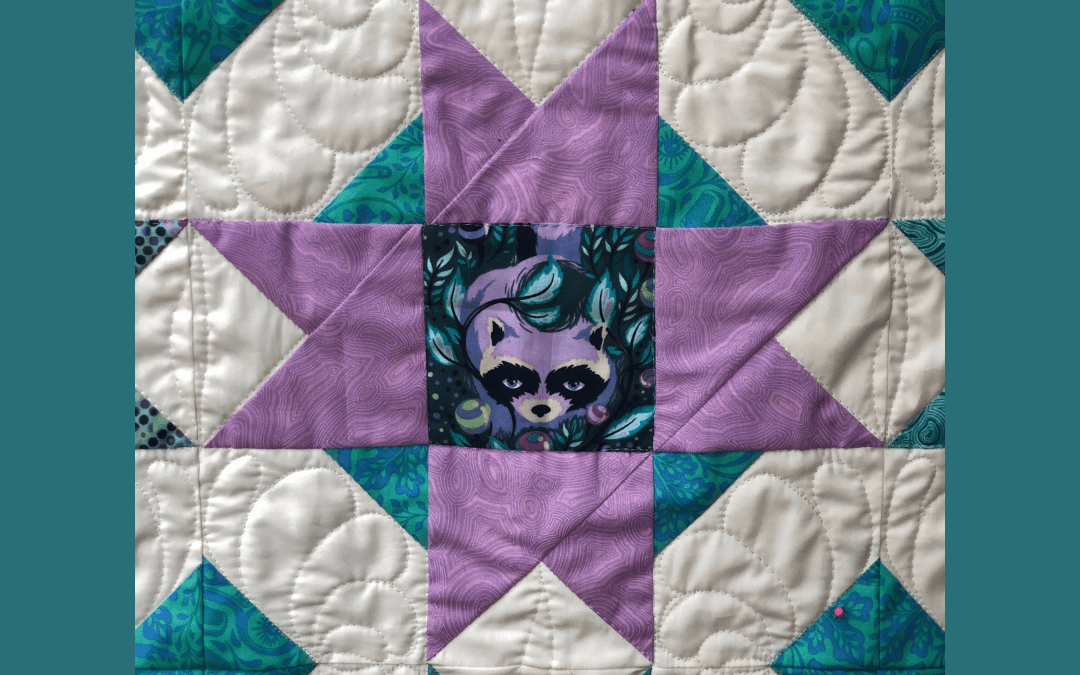
A simple yet striking quilting method is to stitch gentle wavy lines across the quilt using a walking foot.
Set your stitch length to about 3 mm and sew from one edge of the quilt to the other, forming smooth curves.
Keep the curves at least 1½” apart and avoid crossing them. This design is my favorite “go-to” because it’s quick, easy, and always looks great.
Tip: To keep your wavy lines straight in the direction you choose (horizontal or vertical), place two strips of masking tape about 10″ apart as guides. Move the tape as you work to maintain alignment across the quilt.
Quilting Pattern No.2 Walking Foot or Ruler Foot Quilting
 Although this design may look complex, it’s simply a chevron pattern with varying depths. It’s less densely quilted than Pattern No. 2, so it stitches up more quickly. However, it does require careful accuracy at the points where the lines meet and change direction.
 For an easy but eye-catching quilting design, try stitching soft wavy lines with a walking foot.
-
Set your stitch length to about 3 mm.
-
Sew from one edge of the quilt to the other, letting the curves flow naturally.
-
Keep each line at least 1½” apart, and don’t let the waves cross.
This is my favorite go-to design because it’s quick, simple, and always looks great.
Tip: To keep the wavy lines consistently horizontal or vertical, place two strips of masking tape about 10″ apart in your chosen direction as a guide. Move the tape as you progress across the quilt.
Quilting Pattern No.3 Free Motion Quilting

This quilting design is inspired by a bounce-back feather motif. If you’ve never drawn or sewn bounce-back feathers, you can find a tutorial in my complete Doodle Challenge video set.
Alternatively, I have previously written a post about quilting bounce back feathers. To stabilize the quilt:
-
Quilt in the ditch around each star and the first (colorful) border.
-
Quilt around the feature squares in the ditch as well.
The bounce-back feathers are then drawn and quilted in the squares formed at the corners of the original blocks. Most of your quilting time will go into these stabilizing lines—the feathers themselves stitch up quickly.
I hope you’ve enjoyed this project! It’s been a pleasure sharing my baby-quilt pattern. I’d love to see what you create—please email photos to mail@gillymacdesigns.com